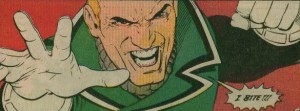
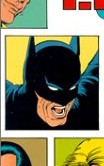
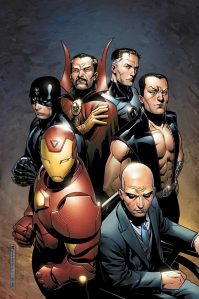
I cropped out Drs. Light and Fate because they were not worthy of my team (translation: I ran outta room for her and didn't have him at all).

Nostalgically beloved, sometimes maligned, the humor-focused era of the Justice League was a daring experiment in mainstream comics. For the first time, one of the Big Two’s marquee team books focused more on the relationships of the characters than on the villain(s) of the month. It proved surprisingly popular (for a while, anyhow), spawning a spin-off or two before it collapsed under its own ridiculous weight. Perhaps if writers Giffen and DeMatteis had dialed back the humor and played it a little bit straighter, the novelty wouldn’t have worn off in only 5 years. After, Brian Michael Bendis has essentially done the same thing with his team books for the past 6 years, with no sign of real fatigue in sales.

But I digress. This is supposed to be about HeroClix.

Now, with the release of several new pieces in The Brave And The Bold set, one can play a solid Justice League International themed team. Here’s mine, from a recent tournament:

JUSTICE LEAGUE INTERNATIONAL
Martian Manhunter (Brave and the Bold) 202 + Camouflage 8
JL Green Lantern (Justice League) 133
Fire & Ice 131
Mr. Miracle & Oberon 115
Blue Beetle & Booster Gold 82
Batman (Justice League #001) 75
+ Inside Information 4
Black Canary (Justice League) 50
= 800 points.

Each round I picked the JSA Museum map from the DC Origin set. Using Mister Miracle and Oberon’s (MMO) Perplex, I boosted Blue Beetle and Booster Gold (B+G) to Charge a hole in the wall so Green Lantern could ferry Canary and Bats to hindering and himself to my Kinetic Accelerator. Then I moved the rest of the team to various set up points.
In Round One, that nearly went terribly south for me against my opponent Wil’s team of Green Arrow and Red Arrow (both from Crisis and both equipped with the Stealth-busting feat Trick Shot), The Wizard Shazam (The Brave and the Bold), Hitman, Songbird (Hammer of Thor), Dr. Strange (Secret Invasion) and Max Mercury with Armor Piercing and Swingline.

Ugh — three shooters who see through hindering terrain and characters and one who sees anything for Probability Control purposes. I didn’t help myself with my colossal mental fail of the evening; not using MMO’s Indomitable ability to freely push to safety and not be wide open to the Arrows’ line of fire. MMO immediately took big damage and had to flee to the nearby Eleha’al Vine for eventual healing.
To stop the twin Trick Shots, I used Green Lantern to taxi both A) Black Canary in base with both of them and B) Batman nearby to make a follow-up attack next round. The first tactic was thwarted when Canary was KO’d the very next turn and the second, when Songbird built a Barrier to stop Batman.
I thought I was thoroughly hosed at this point; the Barrier would fall and the free Trick Shot pieces would murder Batman with impunity. But I saw an escape route. Batman shadow-warped to an adjoining room to shoot out a wall and counter Songbird’s Barrier, giving Blue Beetle & Booster Gold a chance to take Canary’s place as the tie-up. That was all the stall time I needed to get Martian Manhunter, Green Lantern and Bats into the fight for real so they could clobber Green Arrow for the win before I could lose any more characters. 1-0.
—————-
ROUND TWO was vs. Zach, Wil’s son, running Iron Man (Secret Invasion) + Elite Sniper, Zauriel, Yellowjacket (Secret Invasion #006b), Talia (The Brave and The Bold), Punisher (Secret Invasion), Batman  (The Brave and The Bold), Venom (Hammer of Thor) and Pawn 502. I stuck with the Museum.
I was more careful of my placement this time. Zach wasn’t, putting Zauriel and Iron Man in a spot where my Batman could harass them immediately with “Out of the Shadows.” I decided to swarm Iron Man, taking care to avoid Talia clear on the other side of the map. Pounding and pounding Stark until he was down, I then followed suit upon Punisher and Yellowjacket  (although his high % of Skrull rolls made that take a lot longer than it should’ve). I again lost Canary but she did her job of drawing fire and taking theme PC tokens. 2-0.
—————-
FINAL ROUND was vs. Bradley’s not-quite-themed team of Spectre (Crisis), Wizard Shazam (The Brave and The Bold)Phantom Stranger, Deadman, Jason Blood and Scarlet Witch (Avengers SR).

After surviving Spectre’s first strike on MMO by burning all three of my theme PC rolls, I shot back with Fire & Ice for a successful RCE hit of my own. I again used GL to carry Batman in closer, pushing Fire & Ice to compound the damage to Spectre.
From this point, with Spectre neatly tied down by GL, I began to advance my force in earnest to rid myself of Phantom Stranger, whose 18 Defend was making further hits on Spectre unlikely — especially with 1-3 enemy Probability Controllers to get through. But despite a crit miss or two, I got the Stranger off Defend, took down Spectre and eventually added Phantom Stranger and Scarlet Witch for a commanding win, losing only Green Lantern when my young opponent used Deadman to Possess Fire & Ice into blasting the stuffing out of GL.
Final: 3-0. The prize, appropriately enough, was the Justice League International alternate team ability. :)
Much like the characters in the comics, this is a more effective team than it looks on the surface!

Yes. The cookie throne sculpt IS comic-accurate.

Martian Manhunter (The Brave and the Bold)
After some 5+ versions in HeroClix, they’ve finally gotten J’onn J’onnz exactly right (in spite of the humorously thematic nature of his cookie-mad dial). Hypersonic Speed is a power he’s always needed in ‘clix but never gotten until now because his more iconic Phasing ability has always taken up the slot. Now that and Shape Change are tucked away in a Trait, freeing up his Speed slot for HSS and Mind Control. That trait makes him perfect for the Camouflage feat, which makes him utterly invulnerable to ranged attack (when he’s next to a wall or blocking terrain) since his Shape Change can’t be countered by enemy Outwit. If he gets hit, “Telepathic Invisibility” offers a hefty defense boost. He can sport as high as a 20 DV!
Both appropriate and effective, “Cookie Martian” is thoroughly essential for JLI teams 400 points or higher.
JLI Rating: Bwah-HA-HA-HA-HA-HA!!

Words of unintentional hilarity and uncomfortable truth.

Green Lantern (Justice League SR)
The sole representation of bad-boy Green Lantern Guy Gardner in HeroClix is mediocre. He starts with Charge but his damage is low, his Enhancement shows at the worst spots, and his Flurry SP arrives when his defenses are soft.
But for this team, the Green Lantern Corps TA was invaluable for carrying Black Canary and Batman, and he was able to draw a lot of fire thanks to his starting Invulnerability. I’m not overstating matters to say that at least one game would’ve been lost without him.
(Great. Now he’ll get the swelled head.)
JLI Rating: Bwah-HA-HA!

So HAWT!!!!! And so coooooool.

Fire & Ice
Can you say “damage cannon?” ‘Cause that’s what these babes are, able to hit for 5 via Ranged Combat Expert or 3 and 2 with the Duo Attack. Even better, they can push off it to gain their Barrier+Poison combo SP, making them super versatile. They’re also JLI fixtures, theme-wise. Fit ’em in if you can!
JLI Rating: Bwah-HA-HA-HA-HA!
Don't worry, Scott Free. You and Oberon totally belong.
Mr. Miracle & Oberon
Lots of Perplex really helps the team’s stats. 18 DV + Combat Reflexes also helps the team by tying up someone and being nigh-unhittable. But it’s the combo of Duo Attack and Indomitable that makes MMO a fixture on any team, and with Perplex that means he can deal 10 clicks in two turns. He certainly dealt a lot of clicks in this tourney. (Lunge is a super feat for him, but I didn’t have room for it this time around.)
JLI Rating: Bwah-HA-HA-HA-HA!!

These truly Super Buddies are way better than the slackers they appear to be.

Blue Beetle & Booster Gold
Their damage is low and their starting AV is just an OK 9. But the good news is that they push well to 10 AV and Outwit to help that damage stick. They also sport Perplex on other clicks.
But the reason they, perhaps more than any other member of this team, should be the first to add to your force is “Super Buddies Forever,” which gives adjacent keyword sharers +1 AV. Their double base offers a lot of said adjacency, and it frees up Perplex for damage. YAY!!! And, of course, there’s no piece more worthy for this themed team than the Blue & Gold.
JLI Rating: Bwah-HA-HA-HA-HA-HA!!

Not really happy to be here. But then, when IS Batman happy?

Batman (Justice League #001)
He’s a key piece of course, delivering plenty of clutch moves and yet he’s not the biggest threat. He’s also not as iconic for the team as some of the others.
JLI Rating: Bwah-HA-HA-HA!!
Black Canary (Justice League)
She was only filler. But she was Stealth-shielding, theme-PC-taking, shooter-locking-down filler well worth her points.
JLI Rating: Bwah-HA-HA!!
Hope your own JLI games have Bwah-ha-happy endings!

Seriously. I can’t believe some of the utter FAIL I’ve still been experiencing in HeroClix games lately.

Black Adam. I seem to make stupid tactical FAILs with this character more than any other. Back when he was new back in the Crisis events, I’d do ridiculous things like:

  • use his Impervious 254-point body to shield a 61-point medic from Outwit-equipped snipers. Barely escaped that game with a victory thanks to the time limit.
  • Hit Crisis Spectre hard with a Hypersonic hit and neglected to use the rest of his movement, leaving him completely vulnerable to the wounded but still-dangerous giant. I lost that game, snatching defeat from the very jaws of victory. Giant Hypersonic FAIL.

Lately, I’ve pulled Black Adam back out of the tacklebox. And I’ve made the same sorts of utter FAIL:

  • Used Exploit Weakness on a near-dead KC Shazam instead of HSS, leaving him vulnerable to repeated Lunging Stunning Blows from HoT Daredevil. Utter Hypersonic FAIL.
  • Didn’t use his full HSS speed with a full-health enemy V Icons Superman on the board, and didn’t really have much of a reason why I didn’t get him out of reach. Worse…I didn’t use his lower-pointed passenger to block line of fire to him. About three different FAILs. In one action.

Now with a new Black Adam as part of the Shazam! and Black Adam duo, I had another chance to do well by him…or not. See, I put Lunge on the guy (since he has Close Combat Expert much of his dial) and went to town, using the feat to get a quick one-hit-KO of Max Mercury. But later, I took a HSS chance to try to take out an enemy Brave + Bold Superman and lacked the speed to get back to relative safety.

Wasn’t until much later that I realized I’d forgotten Lunge, that would have given me the extra movement to not get so easily ganged up on by BB Superman and Wizard Shazam. Amnesiac FAIL.

In the same game, I utterly forgot BB Metallo was Indomitable, thus losing crucial attack chances. Lost that game. Double FAIL.

In the game previous, I didn’t use Goodness & Mercy’s SP Willpower to chase down a healing enemy. SP FAIL.

These FAILs paled next to today’s though.

Scenario: My Extant, way up on points and on his 1st click against enemy Flash (Justice League Super Rare) has a shot at long range. Afraid my 10 AV isn’t enough hit an 18 DV + Super Senses, I Phase in close. Flash proceeds to alternately Flurry, Hypersonic and generally pummel my weakening Extant to KO.

I wasn’t finished. Same tournament, tired of trying and failing to hit an enemy Black Flash, I pursue and base a wounded Max Mercury hiding on an Eleha’al Vine. Max uses Flurry to land 8 consecutive attacks to deal (with the other White Knight) my reducer-less Extant a bitter defeat.

Extant has full-dial Phasing and a 10 range. 10 RANGE! WHY WAS I BASING NON-STEALTHED CHARACTERS THAT COULD USE FLURRY….TWICE?!?

Worst bit of FAIL since forgetting to play my TKer in the last FAIL article.


Read the introduction to the series here.

E101 RAGNAROK

What, it's the end of all things AGAIN?

WHAT TO BRING: Characters cards and/or keyword lists to make sure the  characters are accounted for correctly.
THE SETUP: All characters on a player’s force that have the keyword possessed by the most characters on that force (or the character that has the highest point value, if the characters possess no common keyword) are that player’s “Asgardians”. Any remaining characters are that player’s “Monsters”. Then, characters that have the Asgardian or Monster keyword can choose to become part of the group matching their keyword. Place eight objects on the battlefield instead of six, and do not replace any of them with special objects.
WHAT IT MEANS: Themed teams will lose out on some of the conditions and effects of the dial, so you might not want to build one. Super Strength will have a field day.
TURN THE DIAL: At the end of each round.
WHAT IT MEANS: Steady-moving event dial.
Treacherous Loki  (brown, slots A-C): Choose a friendly character. The character can use Outwit and Perplex.
WHAT IT MEANS: You might want to field anti-Outwit tactics (Stealth, Fortitude, Outsmart, certain team abilities) because you WILL be facing the power. By the same token, building in a character to best use this effect would be a good strategy. But you don’t really have to, since you can switch your “Loki” from turn to turn.
A Mob of Mjolnirs  (lime, slots A-C): Monsters can pick up objects as if they possessed Super Strength. All objects deal 1 additional penetrating damage when used in an attack.
WHAT IT MEANS: No need to build in Super Strength to use all those extra objects…at first. But because the effect doesn’t last long, it doesn’t hurt to have some actual Super Strength on the team.
March of the Trolls (blue, slots C-E): Monsters modify their speed values by +2.
WHAT IT MEANS: Move and attack powers get a boost here, so try to fit some among your non-Asgardians. It also helps your monsters act as good tie-up sacrifices.
Rally at Vanaheim (black, slots E-F): Asgardians can use Regeneration.
WHAT IT MEANS: The majority of your build gets a second wind (maybe). Here it pays to build in piece that actually has Regeneration among your Asgardians and feat it with Automatic Regeneration to get extra mileage from this effect.
Fall of the Trickster (yellow, slots G-J): Characters can’t use Outwit or Perplex.
WHAT IT MEANS: Suddenly all those powers and abilities you were so worried about earlier are safe. Now’s a good time to push the advantage, especially in conjunction with the next (and concurrent) dial effect…
The Odin Force Returns (cyan, slots G-J): Choose a friendly character. The character can use the following powers as if it had a range of 12: Energy Explosion, Psychic Blast, Pulse Wave, and Quake.
WHAT IT MEANS: Field someone with high attack value and Running Shot and try to make sure they survive to this point so they can viciously explode your enemies to cinders.
Last Battle (red, slots I-K): Once per action, Asgardians given an action or declared the target of an attack can modify one of their combat values by +1 until that action resolves.
WHAT IT MEANS: No Perplex (thanks to “Fall of the Trickster”)? No problem!
All That Remains (orange, slot L): The game ends immediately. Each player receives 10 fewer victory points for each character on an opposing force that was not defeated.
WHAT IT MEANS: Here’s where building a bigger force (that survives) can yield some dividends. On the other hand, KOs are still king, and and smaller team of beaters will give up fewer points (again, if they survive).
SUMMING IT UP: This dial is about speed-fighting to the absolute death, gaining as many KOs as possible in 11 rounds. Build for such and throw caution to the wind.

It’s that time again: another brand-new HeroClix set. Considering that this time last year we didn’t think we’d ever see one, I for one am quite grateful.

One thing I am not so grateful for, though, is WizKids’ ceasing to print the handy little checklists they used to pack in every booster. Yes, I’m sure they’re an ultimately needless expense, but the company could offer downloadable and printable PDF versions.

Fortunately, I’m a fairly talented graphic designer myself, so I’ve been crafting my own checklists since WizKids stopped doing theirs in Secret Invasion. Now that I have my own little HeroClix blog, I figured I should share.

BBpocketchecklist

BBpocketchecklist (updated April 17, 2010 with added AE point cost for Etrigan and minor spelling/name changes [for instance, “ATOM & HAWKMAN” is now properly spelled “THE ATOM AND HAWKMAN”))

Read the introduction to the series here. Catch up on previous articles here.

AAE102 KNIGHTFALL

This dial reflects DC's Batman-centric Knightfall, Knightquest and Knightsend storylines from the mid-199os.

TURN THE DIAL: At the end of each round.
WHAT IT MEANS: Another steady-moving event dial.
Arkham Escape (yellow, slot A): When characters that begin your turn in your starting area are given a move action, it doesn’t count toward your available actions for the turn.
WHAT IT MEANS: Hey, everyone gets Avengers/JLA/Top Cow TA for a round.
Break The Bat (lime, slots B-C): When the result of a successful attack roll is doubles, the damage dealt is pentrating damage.
WHAT IT MEANS: No way to prepare for or defend against this.
A New Batman (red, slots D-G): Once during your turn, you can choose a character on your force. The chosen character is able to use Blades/Claws/Fangs and Toughness (if it can’t already) until the beginning of your next turn. Until the beginning of your next turn, opposing characters get +1 to their attack value when attacking the chosen character.
WHAT IT MEANS: Note that this character can change each round…and may have to when the enemy gets easier shots on the newbie “Batman.” Characters with Charge, Flurry or Exploit Weakness (or all three, natch) are good candidates for this effect.
The System (black, slots E-H): Once during your turn, you can choose a character and modify one of it’s combat values up to +3 for the duration of an action. After the action resolves, roll a d6 and subtract the number of characters (friendly and opposing) adjacent to the character. If the result is equal to or less than the number by which you modified the combat value, deal 2 pentrating damage to the chosen character.
WHAT IT MEANS: Pump ’em up for a price. Taking 2 damage is pretty grevious, but getting to deal a potential +3 damage might be worth it. Just make sure you can handle the possible backlash. Also try to make sure the System’s beneficiary doesn’t have a crowd around him increasing his chances of taking hurt.
Reclaiming The Mantle (blue, slot H): All characters can use Willpower (if they can’t already and can’t use the Indomitable ability). For each of a character’s powers or abilities that has been countered, modify it’s attack value and defense value by +1 (maximum +3).
WHAT IT MEANS: Outwit is not the nerf-all it usually is, so use it with care, if at all.
SUMMING IT UP: This dial is mostly straightforward and uncomplicated (except for some of that “The System” nuttiness).
That wraps it up for DC event dials (for now). But what could have been the end for HeroClix only became an hiatus. And along with figures and feats came new event dials. Stay tuned for RAGNAROK!

Read the introduction to the series here and catch up on previous articles here.

AAE101 NO MAN’S LAND

Based on the 1999 event, in which an earthquake hits Gotham City.

WHAT TO BRING: Three extra Special tokens for each player.
THE SETUP: WHERE’S BATMAN?: Before characters are placed on the map, each player must choose one character from his or her force to be that player’s champion. The champions are set aside until brought into the game by the Return of Batman effect.
WHAT IT MEANS: Said effect won’t come into play until mid-game, so don’t make your champion too big a part of your force.
MORE SETUP: TERRITORIES: After all players’ forces have been placed in their starting areas, but before the beginning of the first round, each player receives three control markers. Beginning with the second player, each player places a control marker on the map at least 5 squares from any starting area being used by a player and all other control markers, and at least 3 squares from the edge of the map. Players take turns placing control markers until all players have no control markers or all players agree that control markers can no longer be placed legally. Control markers can’t be moved or destroyed.
WHAT IT MEANS: You’re setting up zones to occupy on the map. You’re going to have to defend yours and/or take others’, so build your team accordingly. Also pick your control marker locations carefully. There’s going to be little cover and hindering terrain will be a dangerous place to be (in fact, any terrain that’s not clear grounded terrain or water terrain WILL be hindering terrain).
STILL MORE SETUP: NATIVE SURVIVORS: Once per turn when making an attack roll for a character on your force that has the Batman Ally or Batman Enemy team ability or the Gotham City keyword, you can roll 3d6 instead of 2d6; use the two highest results.
WHAT IT MEANS: It pays to stick to the theme!
TURN THE DIAL: At the end of each round.
WHAT IT MEANS: Steady-moving event dial.
AFTERSHOCKS OF THE CATACLYSM (white, slots A-J): All walls are
ignored, and blocking terrain and elevated terrain are hindering terrain instead. Beginning with the second round, at the beginning of each player’s turn he or she can choose an opposing character occupying hindering terrain and roll 2d6. On a result of 9-12, deal 2 damage to the chosen character.
WHAT IT MEANS: First, realize that a printing error on the dial means there’s only an X where the lime color indicated on the card should be. That erratum given, you may want to be really careful about using Stealth-dependent people with less than Invulnerability to protect them. An opponent can get an easy shot on them through this effect. On the other hand, the utter and complete lack of cover means range is king. It might be worth fielding a lot of Stealth anyway just to not get sniped to death when you have to venture out to claim and hold territory later.
CITIZEN WAYNE  (black, slots A-E): Once per turn for the duration of an action, you can modify any combat value of a friendly character (except damage) by +1 for each full 75 points (or fraction thereof) of your champion’s point value (maximum +3).
WHAT IT MEANS: It’s a bit like Contingency Plan, but without having to build up those pesky tokens. It also pays here to use a champion in the 100-point range to gain the +2 boost.
BLOWING THE BRIDGES  (orange, slot C): At the beginning of your turn, choose an opposing character’s starting area and roll a d6 for each character in it; on a result of 1 deal the character 1 penetrating damage.
WHAT IT MEANS: Campers may pay for turtling. Be sure to build a force mobile enough to be out of there by round 3, when this effect shows up.
CLAIMING TERRITORY  (blue, slots D-J): At the end of your turn, immediately score 20 victory points for each of your characters occupying the same square as a control marker.
WHAT IT MEANS: This is extra incentive to get your force out and about. Characters with good speed values, mobility powers and defenses are key get and hold your territory. Consider especially characters with Defend who can use a cheap meat shield to block enemy attackers. You’ll probably want to avoid team formations that require most of your team to stay clumped together, as this will cost you a lot of points down the road unless you can KO the enemy quickly outright without surrendering too many points to them in turn.
SCROUNGING  (yellow, slots E-I): At the end of your turn, choose up to two of your characters that are 3 or more squares from all control markers. For each chosen character, roll a d6 and subtract 3; the character is healed of damage equal to the result (minimum 0).
WHAT IT MEANS: 50% chance at free healing! Mobility powers are good for this effect, too. If a territory holder is getting too beaten up, run away for a shot at healing while replacing him/her with a fresh defender.
RETURN OF BATMAN (cyan, slots F): At the beginning of the round starting with the first player, all players place their champion on the map 6 or fewer squares from (but not in) their starting areas.
WHAT IT MEANS: Hope you got all you needed from the Citizen Wayne effect, because that’s done now. ‘Course, you’ve got your “Batman” in the game now for a 2nd wind.
CONSOLIDATING TERRITORY (red, slots G-K): When making an attack, for each friendly character that occupies the same square as a control marker and that is 8 or fewer squares from the attacker, you can modify the attacker’s attack value by +1 (maximum +3; the character does not need a clear line of fire to the attacker).
WHAT IT MEANS: Here’s when holding your ground earlier can really pay off. But you won’t get long to enjoy the advantage, as the next condition thoroughly invalidates it despite multiple clicks of overlap.
DESTRUCTION OF THE HALL OF RECORDS  (purple, slots J-L): At the beginning of the round, remove all control markers from the game.
WHAT IT MEANS: Ummm…just what it says, which is odd. All the markers would be gone as of slot J. So what’s the point of it being on K and L? I dunno. Looks like another error to me.
Note that this supercedes the previous Consolidating Territory effect even though they overlap for a couple of rounds. Use this condition’s appearance as a cue to move off of currently wrecked buildings or blocking terrain or at least make sure you won’t be shoved out into the open completely.
RECONSTRUCTION  (grey, slot K): All walls are no longer ignored. If characters occupy blocking terrain or elevated terrain when this effect is revealed, move them to the nearest unoccupied square of clear grounded terrain.
WHAT IT MEANS: Buildings are back…for a while. If you weren’t careful about your position in previous rounds, you might be shunted into a bad spot in full view of enemies.
JOKER’S LAST LAUGH (green, slot L): At the end of your turn, choose an opposing character 6 or fewer squares from your champion to which your champion has a clear line of fire; deal 1 penetrating damage to the character.
WHAT IT MEANS: Someone’s gettin’ it unless your champion is completely isolated from the enemy (or the enemy is all hiding).
Note that while this dial should thematically end at this point, it doesn’t have the red line indicating that the dial should stop turning, so the whole cycle can start over again, except this time without control markers, because they only get placed before the game.
(Yeah, seems like a mistake to me, too.)
SUMMING IT UP: Interesting dial that focuses more on positioning and map control than on the usual slugfestivities. It’s hindered a bit by incompatibilities and what look to be straight-up production mistakes, but it’s still playable.
Next: In a Batman-related set like Arkham Asylum, it’s no surprise that the other event dial is also Batman-inspired.

Read the introduction to the series here. Catch up on previous articles here.

E102 INFINITY GAUNTLET

Based on the classic 1991 miniseries.

BRING:
–newer maps with letters and numbers along two edges.
–eight extra tokens marked somehow as the Infinity Gems (event tokens). I use gem tokens that match the colors of each Infinity Gem condition.
–a ton MORE tokens distinct from both your normal action tokens and the event tokens. These’ll be the power tokens.
–Paper to keep track of extra points scored.
PLACEMENT: The Corner of the map where A and 1 intersect is Corner 1; Corner 2 is the next corner clockwise around the edge of the map, and so on. When instructed to place an effect token by an effect of this event dial, roll 2d6 to determine where the determination of placement begins based on the result: Corner 1 (1-3), Corner 2 (4-6), Corner 3 (7-9), Corner 4 (10-12). Next roll 2d6 amd count a number of numbered rows away from the corner equal to the result, then roll 2d6 and count a number of lettered columns away from the edge in that row equal to the result. Place the effect token in the nearest square of unoccupied clear terrain.
WHAT IT MEANS: Tedious placement of tokens that’ll occur all game long. You may want to do a few test runs before the game just to get a feel for Placement so it won’t slow the game down even more.
THE GEMS AND THE GAUNTLET: This scenario requires eight special tokens, clearly labeled with the eight effects listed below (one per token). These are event tokens.
WHAT IT MEANS: Try to pick some markedly distinctive from both the players’ normal tokens and from each other to minimize confusion. I use tokens corresponding to the Infinity Gem colors.
THE GEMS APPEAR: At the beginning of each turn, if the effect token for an effect indicated on the dial is not currently in the game, place the token for the effect on the map, as explained in Placement and as determined by the player whose turn it is.
WHAT IT MEANS: Tedious placement of tokens that’ll occur all game long.
I SEIZE IT FOR MY OWN!: Effect tokens can be carried by any character, but a character may only carry one effect token at a time. When a character picks up an effect token or carries an effect token at the beginning of your turn, you can choose which one of the numbered options of an effect a character can use; the character can use the chosen option as a free action.
WHAT IT MEANS: Fun stuff, since each token gives brand-new power options. No way to plan for this stuff.
SUCH POWER… TOO MUCH POWER!: Each time one of a player’s character uses an option of a Gem Effect, place a power token in front of that player. After that use of the effect resolves, that player rolls 2d6 and adds 1 for each 100 points (or fraction thereof) of the character’s point value; if the result is equal to or less than the number of power tokens in front of that player, remove all power tokens and roll a d6: on a result of 1-3 all effect tokens carried by that player’s characters are dropped, on a result of 4-6 only the most recently used effect token is dropped. When a character carrying an effect token is successfully hit by an attack and the result of the attack roll is doubles, the character drops the effect token (even if it takes no damage from the attack).
WHAT IT MEANS: You have to roll to see if you can hold onto the Gems. You’ll always add at least +1 to the result…the more powerful the character (points-wise), the better the chance of not losing the Gem.
IN SEARCH OF A NEW MASTER: When an effect token is dropped, the effect ends immediately and the token is placed as explained in Placement and determined by the player whose turn it is.
WHAT IT MEANS: You got it…tedious placement of tokens that’ll occur all game long.
TURN THE DIAL: Each time a character is defeated and each time a character is hit with a critical hit and at the end of each round.
WHAT IT MEANS: The dial will turn steadily, and faster with KOs. No camping on conditions you like.
WIN CONDITIONS: Defeating a character carrying an effect token scores 50 additional victory points per 100 points (or fraction thereof) of the defeated character’s point value (maximum 150 additional points per character defeated); defeating a character not carrying an effect token scores 50 fewer points (minimum 0 victory points total per character; scored victory points can’t be negative).
WHAT IT MEANS: Resisting the temptation of power may be worth it, especially for low-point characters. Consider fielding one or two highly effective cheapies on your squad.
Okay, that’s all the super-tedious stuff out of the way. Now for the fun part…the Gems!
GEM EFFECT: SPACE (Purple, slots A-E): Choose one: (1) This character, (2) another character, or (3) any standard object, place the choice in any square of unoccupied clear terrain.
WHAT IT MEANS: Nowhere is safe from the character with this gem. An enemy Batman hiding in a bush? Bring him to the light with option 2. Your own Batman have this gem himself? Put him behind a bush with option 1. Note, also, that this effect is not any sort of action; feel free to attack or move normally afterward! This gem is fine for any character.
GEM EFFECT: MIND (Blue, slots C-F): Choose one: (1) Use Mind Control or (2) use Incapacitate; for both options, modify the character’s attack value by +2 and make the attack as if the character has two range lightning bolts and a range of 8.
WHAT IT MEANS: The character becomes Mutations and Monsters’ Mastermind for a turn. Best for characters who’ll be fighting at mid-range.
GEM EFFECT: SOUL (Green, slots F-I): Choose one: (1) Use Exploit Weakness and Steal Energy (but heal the character of damage equal to the damage taken by the target of the attack) or (2) use Support (do not subtract 2 from the roll of the d6) or (3) use Regeneration (do not subtract 2 from the roll of the d6) or (4) use Poison (but deal damage equal to 3 minus the number of each adjacent opposing characters).
WHAT IT MEANS: Equally effective in close quarters and in the rear field. It does almost zip for ranged fighters, so you’ll want your bricks or support players to grab this gem.
GEM EFFECT: REALITY (yellow, slots A-D): Choose one: (1) Choose a standard power (including named powers using the power) or an ability (including team abilities); the chosen power or ability is countered on all opposing characters until the beginning of your next turn or (2) choose an opposing character; all of the character’s powers are countered until the beginning of your next turn or (3) use Barrier, Outwit or Perplex (but modify the chosen combat value of the target character by +2 or -2).
WHAT IT MEANS: You’ll want to consider fielding Power Cosmic or Quintessence to protect against this effect; Fortitude won’t help. Note also that no line of fire is needed for those first two options. A character with this gem ought to hide if it can.
GEM EFFECT: TIME (orange, slots B-E): Choose one: (1) Roll a d6; before the beginning of your next turn, this character can use Probability Control a number of times equal to the result (but only once per roll) or (2) until the beginning of your next turn, all friendly characters 6 or fewer squares away to which this character has a clear line of fire can use Super Senses (if they can’t already).
WHAT IT MEANS: Rerolls galore. The best character to use this gem is a mid-range fighter or mobile supporter able to see the fighting field.
GEM EFFECT: POWER (Red, slots E-I): Choose one: (1) Until the beginning of your next turn, this character can use Impervious (but add 1 to the result when rolling the d6, maximum result 6) or (2) this character can modify its damage by +2 (to a maximum damage value of 5) and can use Exploit Weakness or Psychic Blast (as if it had a range of 10).
WHAT IT MEANS: Try to get this gem on your fighters.
GEM EFFECT: EGO (Brown, slots A-B, G-L): Choose one character carrying an effect token and roll a d6. On a result of 1 or 2, until the beginning of that character’s player’s next turn all effects of the chosen characters effect token are ignored; on a result of a 3-6, the character drops the effect token.
WHAT IT MEANS: Getting tired of a gem messing up your game? Snuff its effect with this effect. No line of fire needed, either. Naturally, Ego isn’t affected by itself. :)
THE INFINITY GAUNTLET (White, slots J-L): When the Infinity Gauntlet effect token is placed, all other effect tokens are dropped and all other effect tokens (except Ego) are removed from the map. When the Infinity Gauntlet event does not show on the dial, the Infinity Gauntlet event token is dropped and removed from the battlefield. This character can choose up to one option from each of the gem effects described on this event card (each use of an option places a power token normally).
WHAT IT MEANS: for a few rounds, whoever has this gem is like unto a god. Keep a high-speed character around to grab this (or the Ego) token ASAP.

(Just got an image of Lightspeed with Phenomenal Cosmic Powah™.)

SUMMING IT UP: Although it’s very complicated to play, and as mentioned, full of tedious placement of tokens all game long, this remains one of the event dials that won’t inordinately punish certain team builds. Pick up and play!

…and read.

And read.

I believe that does it for the Secret Invasion set’s event dials. Next time we’ll look at Arkham Asylum’s offerings. ‘Til then…!
Read the introduction to the series here. Catch up on previous installments here.

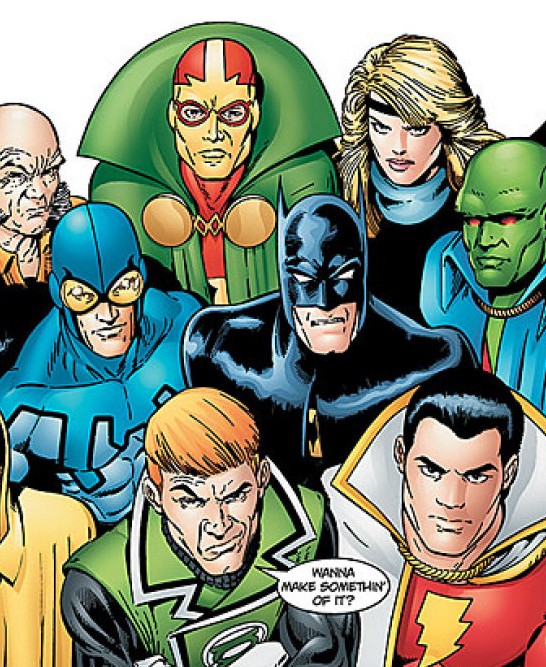
E101 THE ILLUMINATI

Based on the 2007 miniseries. (Also a heckuva 900- or 1000-point team. But that's a post for another day.)

THE SETUP: All characters on a player’s force with the keyword possessed by the most characters in that force (or the character with the highest point value, if the characters possess no common keyword) are that player’s Illuminati.
WHAT IT MEANS: Themed teams could be all Illuminati. Or your tentpole could be the sole Illuminati. Read the advantages and disadvantages of being “Ill” (heh) as you build your squad. Also be sure to bring all your character cards and/or keyword lists.
TURN THE DIAL: At the end of each round.
WHAT IT MEANS: No matter how much you like (or hate) a given condition, it’s not going to last long.
CAPTURED BY THE SKRULLS (Green, slot A): Characters on your force that are not Illuminati can use Outwit (if they can’t already) and the Capture ability.
WHAT IT MEANS: Either a lot of Outwit or not. Here’s where a theme team will have an apparent advantage: it’ll be more likely to have first turn and thus be able to move to counter the enemy’s powers, perhaps en masse, and leave them unable to respond in kind. But don’t go planning your keywordy cheese just yet. To begin with, first-turn immunity will prevent most initial attacks. Second, few characters have the speed to get within Outwit range of the enemy still in their starting area. Third, those characters would lose their own first-turn immunity and could get absolutely creamed by the very team they tried countering or capturing. Finally, the whole effect lasts just one round anyway, so it’s not worth bothering with or building for at all in a normal game. Only give it a thought if you’re in a 3-or-more-player battle royale game.
ESCAPE! (Yellow, slot B): All captives are immediately released. All Illuminati can use Phasing/Teleport.
WHAT IT MEANS: Whatever you gained in the first condition is lost here…one more reason not to even bother with it. Similarly, this condition only lasts a turn. Consider using this opportunity to get your cheap tie-up Illuminati figs to base targets of choice if they’ve already taken their turn this round.
GATHERING THE INFINITY GEMS (Orange, slots C-E): Illuminati on your force can use Probability Control during your turn (if they can’t already). At the end of your turn, roll a d6 for each Illuminati that used Probability Control; on a result of 1 or 2, deal that character 1 unavoidable damage.
WHAT IT MEANS: Finally, a condition that lasts a while, but still potentially useless. A first glance, this looks like another boon to themed teams sharing a common keyword. But the chance of unavoidable hurt makes it a less attractive option. It’s even worse for a team with only one Illuminati.
FACING THE BEYONDER (White, slots E-G): Once during your turn, choose a character on your force that is not Illuminati; that character can use Barrier and Smoke Cloud as free actions, and Outwit (targeting an opposing character that is Illuminati) and Perplex (targeting a friendly character that is Illuminati).
WHAT IT MEANS: All that stuff before that made themed teams seem like a potentially good deal? Fuggedaboudit. This condition will open up that whole team to its potentially crippling effects while being denied its benefits. With that in mind, strongly consider Fortitude to guard your Illuminati tentpole against this and earlier conditions.
ARGUING FOR HUMANITY (Purple, slots G-I): All Illuminati can use the Indomitable ability and Regeneration.
WHAT IT MEANS: A good second wind for any team, especially Illuminati-heavy ones.
DUEL TO THE DEATH (Black, slots J-K): Illuminati on your force modify their attack values by +2 when attacking opposing Illuminati; if Illuminati deal 2 or less damage, the damage is penetrating damage.
WHAT IT MEANS: Illuminati-heavy teams will gain a major advantage over tentpoles, and this advantage lasts for the rest of the game.
INFILTRATED! (Blue, slot K): All Illuminati can use Outwit and Shape Change (if they can’t already).
WHAT IT MEANS: Illuminati-heavy teams again have a distinct advantage, especially if the Illuminati-tentpole player didn’t equip theirs with Fortitude. And again, this effect doesn’t go away.
SUMMING IT UP: First, do not run a themed team. You’ll pay for it. Next, make sure your Illuminati character or characters have Stealth or a mobile taxi (or taxis) or meat shields or some other method of gaining line of fire while denying it to opponents for all those event-dial-granted powers. Finally, decide if you’re going Illuminati-heavy (as with a near-themed team — minus one) or Illuminati-tentpole, and feat appropriately.
The series continues next time with something only alluded to in this dial: The Infinity Gauntlet!

Read the introduction to the series here and catch up on the rest of the series here. Especially note an update to the Civil War article.

E200 CRISIS ON INFINITE EARTHS: PARIAH

Another e-dial with a sculpt, this one based on this image:

Such a WHINER. Just because entire universes are being destroyed is no reason to be such a drama queen.

THE SETUP: Put this event dial (also called “PARIAH”) in a square of clear grounded terrain as close to the center of the battlefield as possible. The square occupied by PARIAH is considered to be blocking terrain for movement purposes and hindering terrain for line of fire purposes.
WHAT IT MEANS: Read on.
MORE SETUP: Any standard character adjacent to PARIAH modifies its defense value by +2 when attacked by a character with the Colossal damage symbol.
WHAT IT MEANS: Ah, it would seem that one would like to get adjacent to the center of the map, and PARIAH, as quickly as possible. But it’s not that simple…
TURN THE DIAL: At the end of the round, roll 2d6. If any character is adjacent to PARIAH, turn the dial on a result of 8-12; if no character is adjacent to PARIAH, turn the dial on a result of 6-12.
WHAT IT MEANS: The dial moves slower if PARIAH has company.
GREATEST SCIENTIST OF THEM ALL (green, slot J): Once during your turn, choose a character on your force that can draw a clear line of fire to PARIAH and is 8 or fewer squares away. The chosen character can use Perplex or Probability Control if it can’t already use it.
WHAT IT MEANS: This is another reason to stick near PARIAH. Stealth might be a good idea, too, to be able to use this effect without being in the open.
HOW MANY MORE WORLDS MUST DIE (white, slots B-G): Roll a d6 at the beginning of the round. All characters a number of squares equal to or less than the value on this event away from PARIAH that are not adjacent to PARIAH are dealt 2 damage; on a result of 1 or 2, the damage is penetrating damage.
WHAT IT MEANS: You REALLY want to be next to PARIAH if you’re anywhere near the guy. But, as I alluded to earlier, it’s not that simple, because of the next effect…
HERALD OF THE END (purple, slots B-G): At the end of your turn, roll 2d6 and subtract 6 from the result (minimum result 0; a player playing Anti-Monitor does not subtract 6 from the result). You must move PARIAH a number of squares equal to the result, ignoring characters and terrain as long as PARIAH ends the movement in a square of non-blocking terrain as far as possible from the square he previously occupied.
WHAT IT MEANS: Whoever gets first turn has a disadvantage. Because this effect allows players to move PARIAH in a straight line in any direction, player 2 (or whoever) can march him near (but not adjacent to) enemy figures who will then have no choice but be dealt damage by “How Many More Worlds Must Die” in the beginning of the next round. For this reason, one might want to avoid themed teams and the initiative roll bonus they offer.
I CAN ONLY WATCH! (cyan, slots C, E-F): Characters adjacent to PARIAH can’t be given an action if they have one or more action tokens.
WHAT IT MEANS: Being next to PARIAH isn’t all good. In fact, it might be positively disastrous if “Herald Of The End” and “How Many More Worlds” combine to get these effectively frozen figs exploded.
SAVED FROM EARTH-6 (yellow, slots F-G): At the end of your turn, choose a friendly character adjacent to PARIAH and heal the character of damage equal to 4 minus his damage value (minimum 0).
WHAT IT MEANS: Your big tentpole hitter shouldn’t be cowering near PARIAH on principle…not for this effect, anyhow. Lesser pieces, on the other hand, may well benefit.
TRAPPED AT THE DAWN OF TIME (orange, slot H): Remove PARIAH from the battlefield (all events on the event dial remain in effect normally). All characters ignore pushing damage.
WHAT IT MEANS: All those bonuses you were depending on in the earlier phase of the battle? Gone now. But now you get super-Willpower.
FINAL BATTLE OF QWARD (red, slot I): During one attack per turn, a character can modify its damage value by +1 if that value is not otherwise modified or replaced. Damage dealt by this attack can’t be reduced to less than 1.
WHAT IT MEANS: Armor piercing for everyone! This is a good reason to field characters with good defense numbers down the dial, because their damage reducers will be rather compromised. By the same token, though, higher-level damage reducers might be worth having to weather the extra-hurtful attacks.
SUMMING IT UP: For a guy named PARIAH, he sure has a lot of company. This dial will only mess up themed teams if they win first turn and then get hit with “How Many More Worlds” consistently.
Next time, we’re back in the Marvel universe to look the Illuminati.

Read the introduction to the series here and catch up on previous articles here.

E100 CRISIS ON INFINITE EARTHS: SUPERGIRL

Saddest cover in DC history.

THE SETUP: At the beginning of the game, choose a character on your force. The chosen character is your Champion. Put 10 champion tokens on your Champion’s character card.
WHAT IT MEANS: Read on.
MORE SETUP: Once per turn when your Champion is given an action, you can remove champion tokens from its character card and modify one of your Champion’s combat values (other than damage) by an amount equal to the number of tokens removed until the action resolves.
WHAT IT MEANS: One key character essentially gets to use the Contingency Plan feat on themselves for free. Not bad.
STILL MORE SETUP: When any character on your force makes a critical hit, put a champion token on your Champion’s character card.
WHAT IT MEANS: A chance to get more use out of the Champion thing.
TURN THE DIAL: At the end of a round in which any player’s Champion was given a non-free action.
WHAT IT MEANS: A dial that can move as quickly or slowly as the players want it to.
WE FIGHT TO LIVE AS LONG AS WE CAN (purple, slots A-B, G-J): Your Champion can use Willpower if it can’t already use it. Once during your turn, you can heal a friendly character adjacent to your Champion of 1 damage.
WHAT IT MEANS: You can push early and often. Not only can your Champion do it freely, but non-Champs can get free healing by hanging near him, making the self-damage of little concern.
RECRUITED BY HARBINGER (yellow, slots C-E): At the beginning of your turn, roll a d6. You can choose a number of your characters up to the result and put them in unoccupied squares in your starting area (they do not have to break away). After the first character is placed, each character placed must be placed adjacent to another character placed by this effect.
WHAT IT MEANS: Need to beat a hasty retreat? No problem with this effect. Field a character with Support (and perhaps the feats Triage or Invigorate) to hang out back there.
UNDER THE INFLUENCE OF THE PSYCHO-PIRATE (cyan, slots D-F): When you give a character other than your Champion a move action, after moving, the character can immediately make a close combat attack targeting an opposing character as a free action.
WHAT IT MEANS: This is a good reason to not go too top-heavy with your Champion and field some good melee fighters in addition. Note that you get a free close combat attack, not a close combat action, so no Flurry, Blades, Exploit Weakness, Close Combat Expert or the like. Super Strength, Steal Energy and plain ol’ high damage work fine, though…and hey! Leap/Climb is thoroughly compatible with this Pounce-like attack.
WORLDS IN LIMBO (red, slots F-J): At the beginning of your turn, roll 2d6. If the result is 9-12, you can choose one of the following: characters, hindering terrain, or blocking terrain. Until the end of your turn, all your characters other than your Champion ignore what has been chosen for movement purposes, but characters can’t end their movement in a square containing what has been chosen.
WHAT IT MEANS: High-Speed characters can take extra advantage of this effect.
JOURNEY TO THE ANTIMATTER UNIVERSE (green, slots G-J): Rolling two 1s is a critical hit. Rolling two 6s is a critical miss.
WHAT IT MEANS: Madness!!! Seriously, it’s almost exactly like the old battlefield condition. No big deal.
THE STATUARY IS ALIVE! (gray, slots H-I): Once during your turn when an opposing character occupies or is adjacent to hindering terrain, blocking terrain, elevated terrain, or a square containing an object, you can roll a d6 and deal damage to the opposing character equal to the result -4 (minimum 1).
WHAT IT MEANS: You’ll probably want to avoid Stealthy characters entirely, unless they’ve got some sort of damage reduction. “The Statuary Is Alive” will eat them alive if they use hindering terrain to hide in and the other team will if they stay in the open.
THE DEATH OF SUPERGIRL (black, slot J): All damage dealt to and by your Champion is penetrating damage.
WHAT IT MEANS: Hope you picked a Champion with a long dial, because he or she’ll need it to survive this effect. Strong Attack and Defense Values down the line will also help. Penetrating damage doesn’t matter if the attack doesn’t land.
SUMMING IT UP: Although this dial appears to encourage extreme tentpoling, DON’T DO IT. There’s just as much for lesser pieces to benefit from. And as you can see, it rewards a pre-built team a bit more than a random one. But it won’t completely hose any team other than a Stealth-heavy one. And nobody plays that anymore…right?

"I know when I'm not wanted."

Next installment will literally bring the Crisis to its KNEES.